Growing Garlic in North Dakota

In most regions of the United States, garlic is planted in the fall and harvested the next summer. The following provides information on growing garlic in North Dakota, including best varieties, planting techniques, types of seed, soils, fertility, weeding, harvesting, storage methods, and pest control.
Garlic is a cool-season crop belonging to the Alliaceae family, which includes other crops such as onions, shallots, and leeks. Most garlic grown in North Dakota is consumed at home by gardeners or sold by growers as fresh whole bulbs, green spring garlic, and scapes. A small portion of the harvested garlic is processed into products such as chopped garlic, pickled garlic, or powder.
Varieties
There are two types of garlic grown in North Dakota called hardneck and softneck. Hardneck varieties bolt during late spring or early summer, producing a flower stalk called a scape. At the tip of the scape is a capsule containing bulbils (tiny aerial cloves), which is produced instead of a true flower.
Depending on the hardneck variety, bulbils come in a wide range of sizes and number produced per plant. Bulbils can be used as seed for planting but usually require at least two seasons to develop into full-sized bulbs. Softneck varieties do not usually produce a scape, although they sometimes produce bulbils in the stock of the plant, especially in cold climates.
In general, hardneck varieties are considered to be very winter hardy, have bulbs with large cloves, and produce fewer cloves per bulb than softnecks. Softnecks tend to be harvested 7 to 10 days before the earliest hardnecks and have a longer storage life than hardneck varieties.
Hardneck garlic produces anywhere from 4 to 12 cloves per bulb, depending on the variety and growing conditions. Specific family groups (which have different varieties within them) grown in North Dakota include Marbled Purple Stripe, Rocambole, Porcelain, and Purple Stripe.
Softneck garlic varieties produce an average of 8 to 14 cloves per bulb. In cold northern climates, the number can be as low as 6 per bulb, and warm southern climates, it can be as high as 25 cloves per bulb. The two Softneck family groups grown in North Dakota include Silverskin and Artichoke.
Since cultivated garlic plants do not produce true seeds, there is no exchange of genetic material between different garlic strains. This means that all garlic is propagated vegetatively from cloves or bulbils, resulting in new plants being clones of their parent plants. In other words, varieties stay genetically the same over time no matter how or where they are planted.

Purple Stripe (left) and Rocambole (right) garlic varieties.
Planting
Garlic is a perennial plant that requires a cold period for proper bulb growth to occur. In North Dakota, garlic is generally planted in the fall and harvested the following summer. Although fall planting is recommended, it is still possible to plant in the spring (see Growing Garlic in Spring for more info). If doing so, the seed bulbs should be placed in cold storage prior to spring planting to allow proper bulb development during the growing season.
It is important that garlic is planted at the right time before winter. Planting too early or too shallow risks having the shoots emerge above the soil surface and being exposed to extremely cold winter temperatures. This can cause dieback of the leaves that have emerged or even death of the plant if the conditions are severe enough.
If planted too late, there is a risk that the cloves will not develop a large enough root system in order to establish themselves before winter arrives. In North Dakota, this usually means planting between September 21 and October 15, however, anytime from the middle of September until a few weeks before the ground freezes is appropriate.
If planting is done at the right time, a strong, well-established overwintering plant will explode out of the ground in spring as soil and air temperatures warm up. If moisture and fertility are adequate, large healthy plants will develop before bulbing takes place. These large plants will then have the ability to produce maximum sized bulbs because of the large leaf surface area which can contribute more energy to the bulbing process.
When possible, it is also important that the cloves are planted with their tips pointed upward. Cloves planted on their sides can still grow nice bulbs, however, they sometimes develop curved stocks and misshapen bulbs. Many commercial growers plant cloves on their sides using seeding equipment, while most gardeners and market growers, plant by hand with the tips pointed up.
The seed garlic should be kept as whole bulbs right up until just before planting. Cloves will start dehydrating and can deteriorate quickly once they have been "cracked" and the bulbs are no longer intact. Dry bulbs are usually easier to crack and brake into cloves than damp bulbs.
The cracking process can be done using mechanical devices or by hand. Mechanical cracking is much faster and is much less work. However, it has a greater potential to physically damage the cloves during the process.

High quality garlic seed cloves ready for planting.
The number of seed bulbs required for planting will depend on the variety being grown and the spacing used. The quantity needed can range from 5000 to 9000 bulbs per acre (100 to 200 bulbs per 1000 square feet). A typical planting can fit between 40,000 and 60,000 individual cloves per acre.
Cloves should be spaced 4 to 6 in inches (10 to 15 cm) apart within the row. Wider spacing will usually allow for larger bulbs to be produced and easier weeding during the growing season. Spacing between rows can range from 8 to 16 inches (20 to 40 cm) depending on the planting, weeding and harvesting methods. Most North Dakota growers use a spacing of 10 to 12 inches (25 and 30 cm).
Some North Dakota growers use bulbils as a seed source. Depending on the variety, capsules can contain anywhere from four to a few hundred bulbils. One advantage of planting bulbils is that it allows growers to increase their planting stock quickly. Some garlic producers also claim that planting bulbils can help reduce soil-borne diseases from the planting stock.
The disadvantage is that it can take several years of successive plantings to achieve good-sized bulbs from the initial bulbil planting. This delay is why most growers only use cloves for planting.
Bulbils tend to dehydrate quickly because of their small size and loose wrappers. This means that bulbil capsules should only be broken open and individual bulbils removed just before planting.
Bulbils can be planted closer together than cloves. However, they can be hard to weed if planted too closely. In-row spacing of between 1 and 4 inches (3 and 10 cm) is a good range for most growers. The wider the spacing, the more chance the bulbils have to grow large first-year rounds or bulbs.
Good soil fertility and watering are very important for bulbil seedlings due to their shallow root systems. They should be properly fertilized and watered regularly throughout the growing season to encourage maximum growth.

Capsule containing large Rocambole bulbils.
Soils and Fertility
Garlic grows well on a wide range of soil types, including both sand and clay. It can be cultivated successfully anywhere in North Dakota that has soils suitable for vegetables. Planting on raised beds of 4 to 6 inches is usually recommended, especially on heavier soils.
The best garlic soils are Sandy Loam with high organic matter. They are ideal because of their high moisture and nutrient holding ability. These soils are also less prone to crusting, settling or compaction issues and usually drain excess moisture easily.
Heavy clay soils can be a challenge and hard to work with, especially under wet conditions; however, some of the largest garlic bulbs are produced on these soils.
On light sandy soils, planting and harvesting tend to be easy; however, special soil management practices are required due to their poor fertility and low moisture-holding capacity.
Garlic is a heavy feeder and grows best on fertile soils. Taking a soil test before planting garlic is always recommended to verify nutrient levels. If fertilizer (conventional or organic) is required, all the phosphorus and potassium should be added and incorporated before planting.
About 1/3 of the Nitrogen should be applied just before or just after planting in the fall. The remainder should be split into several applications starting in early spring and ending about one month before harvest. Always apply granular fertilizers when the foliage is dry to prevent fertilizer burn. Cultivation and watering after fertilizing helps move nutrients down to the roots.
The following table below shows general fertility guidelines for garlic in North Dakota. The values can be higher or lower depending on the soil type, length of the growing season, and previous crop grown. Taking a soil test is recommended to ensure you are applying the proper amount of fertilizer. If you have any fertility-related questions, it is always best to speak with your local state agricultural extension services or an agricultural professional for assistance.
For more information, see "Learn How To Fertilize Your Garlic."
|
Nutrient |
Pounds per Acre |
Pounds per 1000 ft2 |
|
Nitrogen |
120 lbs (55 kg) |
3 lbs (1.3 kg) |
|
Phosphorus |
160 lbs (73 kg) |
4 lbs (1.8 kg) |
|
Potassium |
150 lbs (68 kg) |
4 lbs (1.8 kg) |
|
Sulphur |
30 lbs (14 kg) |
1 lb (0.5 kg) |
Fertility recommendations for growing garlic.
Planting Location
It is best to plant garlic in a sheltered location where good snow cover occurs. This will protect the cloves until spring and help prevent winter kill. Adequate shelter also reduces wind speeds, which prevents wind erosion, especially on light sandy soils.
It is essential to pick a location with good drainage, especially on heavier soils. There should be proper access to water if irrigation will be required. Large trees close to the planting area should be avoided, as well as any areas that are infested with perennial weeds.

Mulching
Most North Dakota growers mulch their garlic for the winter. Mulching helps moderate soil temperatures and keeps the cloves protected from fluctuating temperatures.
It is important to ensure that mulch materials are not contaminated with garlic pests, such as nematodes, bulb mites, diseases, or weed seeds. Wheat straw is the most commonly used mulch and should be applied 4 to 6 inches (10 to 15 cm) deep directly over the planted garlic. Other types of mulch such as oat straw, barley straw or hay can also be used.
In early spring, some growers remove the mulch completely once the threat of extreme cold is gone. Removal helps warm the soil once the snow melts, minimize disease during wet weather, and make weeding easier during the growing season. Other growers leave it on for the whole season to help conserve moisture and provide a barrier for weed control.

Garlic rows covered with straw mulch for the winter.
Watering
Garlic requires consistent moisture throughout the season to maximize its growth. Dry soil conditions, especially during the bulbing phase, will result in significantly smaller bulb sizes.
On clay and loam soils, approximately 1 inch (2.5 cm) of water per week is required during the growing season. On sandy soils, 2 inches (5.0 cm) or more water is often required during hot, dry weather.
The best time of day for watering is during the morning or mid-afternoon. This schedule allows enough time for the plant foliage to dry before cooler temperatures arrive in the evening while avoiding the hottest parts of the day when watering is less efficient. Watering should be stopped once the garlic has matured and it is almost time to harvest. Dryer soil helps with the harvesting process and improves bulb wrapper quality by reducing deterioration.
Scape Removal
Hardneck garlic varieties produce a scape that should be removed if maximum bulb size is desired. Research shows that bulb size can be reduced by as much as 30% when scapes are not removed. Scape development results in energy being diverted to growing bulbils instead of increasing bulb size.
Remove scapes by snapping or cutting them just after they have one or two curls (depending on the variety) but before they straighten out. Scapes are wonderful to eat and can be cooked by themselves or in recipes that call for garlic. Most growers harvest them to eat or sell. They can be stored for up to a month in the refrigerator.
Softnecks do not generally produce scapes, however, in cold climates like North Dakota, some plants may still develop them. Most will form incomplete scapes with bulbils in the stem that cannot be removed. If they grow above the plant, they can be removed just like hardneck varieties.
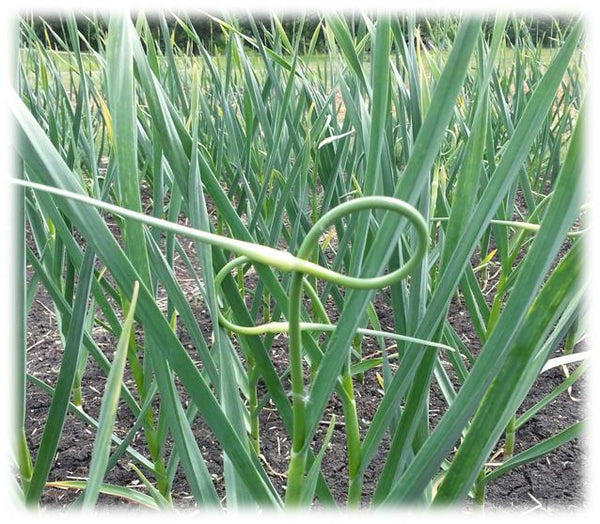
A Purple Stripe garlic scape ready for removal.
Harvest
Garlic bulbs continue to grow in size during late spring and summer until the leaves of the plant begin to die. This process starts with the lower leaves as they dry and turn brown from the tips towards their base.
Harvesting should begin when 30%-50% of the leaves have died and turned brown. For most plants, this means about 3 to 5 leaves have died, and 3 to 5 are still green, depending on the variety. Bulbs that are harvested too early will be immature and will likely shrink when cured. Late harvested bulbs tend to be stained and often have deteriorated wrappers with exposed cloves that do not store well.
For small growing areas, hand-harvesting can be done by using a pitchfork or broadfork to loosen the soil and make removal easier. Large plantings of garlic are usually harvested mechanically with an under-cutter blade pulled by a tractor that cuts the roots and loosens the soil, making harvesting by hand less work. For very large farms, mechanized equipment can be used to lift the bulbs and remove the tops automatically in one operation.
For more information, see "When to Harvest Your Garlic".
Curing
Curing is the process of drying bulbs and reducing moisture content. It results in the reduction of microbial and fungal growth, which increases storage life.
Garlic should be cured immediately after harvest and can be left in the field to begin drying for a couple of days. Plants should be laid on the ground in single layer rows. When laying down the garlic plants, use the tops of later rows to cover the bulbs of the previous rows to protect them from sun scalding.
Alternatively, the garlic can be removed from the field immediately after harvest and brought inside for the entire curing process. Plants can be tied in bundles of 10 and hung to dry, or the tops can be removed and the bulbs placed into slotted crates, onto wire racks, or in open trays in a well-ventilated area. Using large fans to create continuous air movement helps with drying and preventing mold and storage diseases.
Similar to bulbs, bulbils must be cured before storage. Harvest scapes with the bulbil capsule intact just before the garlic bulbs are harvested. After bulbils are removed they can be bunched and hung or put in slotted containers with good air circulation. Once dried, remove the bulbil capsules from the scapes and store them in a dry location until planting.

Harvested garlic laying in the field to dry for several days.
Storage
Garlic that will be used for food consumption is best stored at 32⁰F to 39⁰F (0°C to 4°C) with a relative humidity of 60%-70%. Higher humidity should be avoided, as it creates the perfect environment for molds and root growth to develop.
For most homeowners and small farms storing garlic at these cold temperatures is not feasible because specialized refrigeration equipment is needed. Regular refrigerators do not usually provide the proper conditions for storage and often cause the bulbs to dehydrate, form roots or sprout. If refrigeration is not available, storing at room temperature is the best option.
Garlic that is to be used as seed for planting, should be stored above 55⁰F (13°C) to prevent sprouting and below 68⁰F (20°C), to prevent premature dehydration.
Hardneck varieties can usually be stored up to 6 months at room temperature, while softneck varieties can store up to 10 months. When using specialized refrigeration with humidity control, storage life can be extended to 10 months for hardnecks and well over a year for softneck varieties.
Weed Management
Garlic plants are very weak competitors and require dedicated weed control to maximize bulbs sizes. Weeding can be done with hand hoes, wheel hoes, tillers, mechanical cultivation with a tractor, mulching, or herbicides. Garlic plants have very shallow roots that can be damaged easily, meaning that care should always be taken when tilling or cultivating. Damage to the garlic roots can reduce yields significantly.
For more information, see "How to Weed Garlic".

Garlic field that has been weeded several times throughout the growing season.
Insects and Diseases
There are a number of pests and diseases that affect garlic in North Dakota. Some frequently occur, while others are rarely seen. The most common pests include Fusarium basal plate rot, Penicillium mold, bulb and stem nematode, and viruses. Below are detailed descriptions.
Fusarium Basal Plate Rot
Fusarium Basal Rot is a fungal disease caused by Fusarium oxysporum that affects garlic and other alliums. The fungus can live for many years in the soil. Infections are often linked to mechanical damage or pest injury and occur most frequently at temperatures of 77 to 84°F (25 to 29°C) .
Symptoms include wilting and dieback of the leaves starting at the tips during the middle to late part of the season. Foliage death can take up to several weeks. Rot usually affects all of the bulb bases and can move into the bulb itself. Affected tissue appears brown and watery when bulbs are cut open. Infected bulbs can look normal at harvest but can eventually begin rotting in storage.
Fusarium Basal Rot is managed using a 4-year or longer crop rotation, planting clean-seed and minimizing mechanical or pest injury.
Penicillium Mold
Garlic molds are caused by several Penicillium species and can be found in both stored and planted garlic. Some molds thrive in dry conditions, while others do well under very wet conditions. These fungi are common in the soil growing on infected animal and plant debris. Disease symptoms often start as pale blemishes, yellow lesions, and soft spots. As the infection progresses, a blue-green mold eventually develops on the lesions. In later stages of the disease, bulbs may completely deteriorate and decay.
In planted garlic, the fungus tends to attack freshly planted cloves in warm climates and newly emerged plants in cold winter climates. Sometimes fall infection of the cloves leads to winterkill. If not killed, it leads to weak yellow looking young plants in spring.
Infections are usually spread from infected bulbs during the cracking process, moving spores onto the cloves used for planting. Penicillium molds do not move from plant to plant once the garlic has been planted.
Penicillium molds are primarily controlled by preventative measures. Minimizing the transmission of spores during storage and handling, planting only clean stock and preventing wounding or bruises bulbs are the main controls.
Leek Moth
In North America, the leek moth is an invasive species from Europe that causes damage to onions, leeks, and garlic. It was first found in eastern Canada in 1993 and has since spread to the United States. The Larvae cause damage when they penetrate the young leaves of plants to feed. This feeding weakens the garlic plants, sometimes causing them to not have enough energy to form properly sized bulbs.
Organic pesticides such as spinosid or Bacillus thuringiensis var kurstaki (Btk) are effective controls of leek moth. These products mostly affect the larvae, which are killed once they have begun feeding.
Row covers, which physically block adult leek moth females from laying eggs on plants, can be used. If done correctly, they can be as effective as pesticides in reducing damage, sometimes eliminating it.
Generally, leek moth is not a significant pest of garlic; however, under certain weather conditions, their populations can increase drastically, causing significant damage. Pheromone traps can be used to monitor moth pressure and notify you that control methods may be needed well before any damage has occurred.
Bulb and Stem Nematode
The stem and bulb nematode, Ditylenchus dipsaci, is the most destructive pest of garlic in most of the United States and much of the world. They are a microscopic worm-like parasite that damages plants and is very difficult to control once it is established in a growing area. This pest's arrival can be devastating to a grower and make it very difficult to continue growing garlic or other alliums in the future.
Nematodes can be found in seed, plant debris, soil, or in water. They are most often introduced into a field on infected garlic cloves, but can also arrive with soil from equipment, irrigation water, or overland flooding.
Once present on a farm, nematodes can remain dormant in the soil, survive in plant residues, and on weed hosts for many years and sometimes indefinitely. If garlic is planted again, even a small number of nematodes can reproduce rapidly, resulting in a population explosion that can cause significant damage.
Infected garlic plants become swollen, leaves appear twisted and malformed, young roots and bulbs rot, severely infected plants turn yellow and die. Plants that do not die have bulbs that are deformed, short leaves, and turn brown prematurely at harvest. Severely infected garlic bulbs are soft, discolored, and deformed, with portions of their root system missing.
Planting clean nematode free garlic seed into nematode free soil is the primary control method. Use long rotations out of Alliums for 4 to 5 years to help keep populations low. Remove weeds and volunteer garlic plants every year, even when growing other crops. Proper sanitation should also be followed to prevent their spread from infested to non-infested fields. Tools and equipment should be carefully cleaned before moving them to another location.
White Rot
White rot is a disease caused by the fungus, Sclerotium cepivorum. Only Allium species such as garlic, onions, and leeks are attacked by the fungus.
It produces sclerotia that can live in the soil for many years. These sclerotia can infect plants from as deep as 12 inches below the soil surface. The disease is so infectious that it only takes one sclerotium to infect up to 30 plants. Infections occur most often in cool soils and are inhibited at temperatures above 75°F (29°C) .
Once the disease is in a field, it is very difficult, if not impossible to grow any Alliums, including garlic. This can be devastating to a grower who may be required to no longer grow any of these crops. The disease spreads with infected bulbs, grazing animals, wildlife, and transport of infested soil.
Symptoms include leaf decay at the base, yellowing, wilting, and falling over plants. Roots will rot, and the plant can be pulled from the ground easily. Fluffy mycelium can sometimes be seen on any remaining roots or the bulb. Affected bulbs may become watery, and outer scales crack as they dry and shrink. Small sclerotia (about the size of a cabbage seed) form in and on the surface of affected bulbs. White rot continues to decay infected bulbs during storage if humidity is high enough.
Preventing the introduction of the disease is the primary control strategy. Plant only disease-free bulbs into disease-free soil. If working in fields that have been previously infected, wash equipment, vehicles, and footwear before entering new areas to avoid moving infested soil.
If an infection is found, dig out all the infected plants and those healthy plants growing next to them. Bring the plants and soil to landfill or burn.
Viruses
Almost all sources of garlic contain viruses, though most are dormant. This is because garlic is propagated by cloning, which passes the viruses from one generation to the next. These dormant garlic viruses may not become visible or reduce yields until the garlic plant is stressed or growth is interrupted.
The most common symptoms of virus infection are color changes in the leaves. These include mosaics, streaking, and sometimes complete yellowing. Leaves can also become distorted, forming strange shapes and the plants can become stunted. Symptoms can occur very early in the season or much later.
Viruses can be spread during the growing season from insects or mechanical damage during work like weeding. Weaker plants are more susceptible to infection.
The spread of viruses can be controlled by roguing the garlic throughout the season. The bulbs from affected plants should not be used for seed.
Tissue cultured garlic planted as seed has been shown to be effective in producing “virus-free” garlic, however, it is not widely available. For most growers, providing optimal growing conditions, doing regular roguing, and destroying any culls or plant residues is the best option for keeping viruses to a minimum.
Visit our Online Store to order Quality Garlic Seed Bulbs directly from our farm!
About the Author: John Cote owns and operates John Boy Farms and Garlic Boy Seeds with his brother, wife and family who have been farming the same land for over 140 years. As an agronomist and experienced farmer, he helps others learn how to grow garlic successfully. He has written many articles and is the author of The Master Guide to Growing Big Garlic.